Finally!!!! I have been meaning to write this post and translate my original weather station into C++. It has taken me a lot longer than I thought, mainly due to many other distractions such as house renovations.
Introduction
First things first; I am no expert in C++ but have always liked it since it was my first language along with C. You are probably thinking why I didn't use wiringPi and instead wrote it from scratch? Well mainly for learning purposes on my part but also minimising the use of external libraries.
This is not finished but should be in a good state and I have been running it for months at a time with no segmentation faults etc occurring. I have also integrated lots of nice tools like Cmake (So I can use Clion IDE), docker for cross compiling, easylogging++ and Google test.
I have released it on GitHub under GPLv3. https://github.com/monotok/weatherStationPlus
What is it?
- Written in C++.
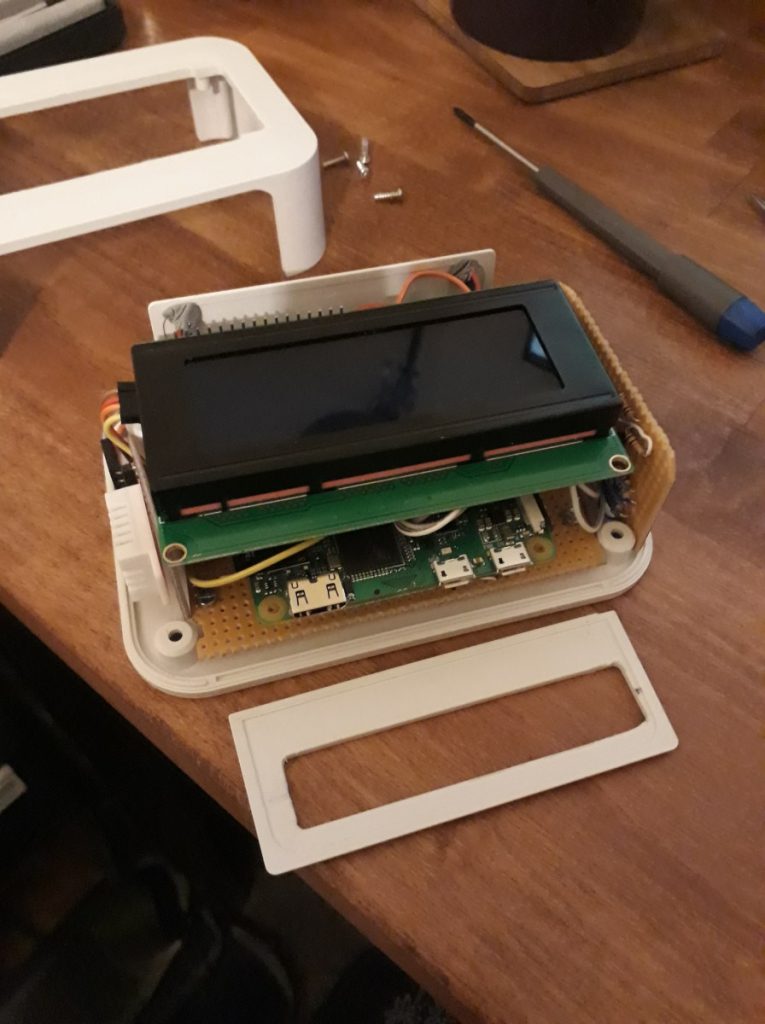
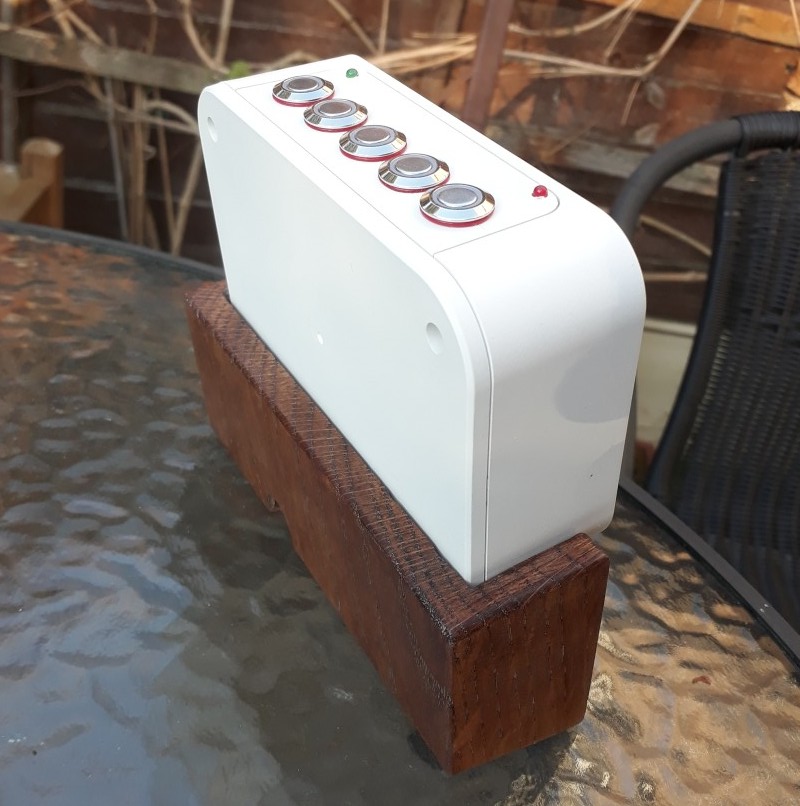
- Comprises of a central 'box' powered by a raspberry pi zero and a atmega 328p chip (8mhz mode) communicating via i2c. The central box has 5 buttons, 20x4 LCD screen and status LED's.
- Remote sensors are supported and communicate via 433 Mhz radio links to the atmega on the central station. The raspberry pi gets the data via i2c from the atmega chip.
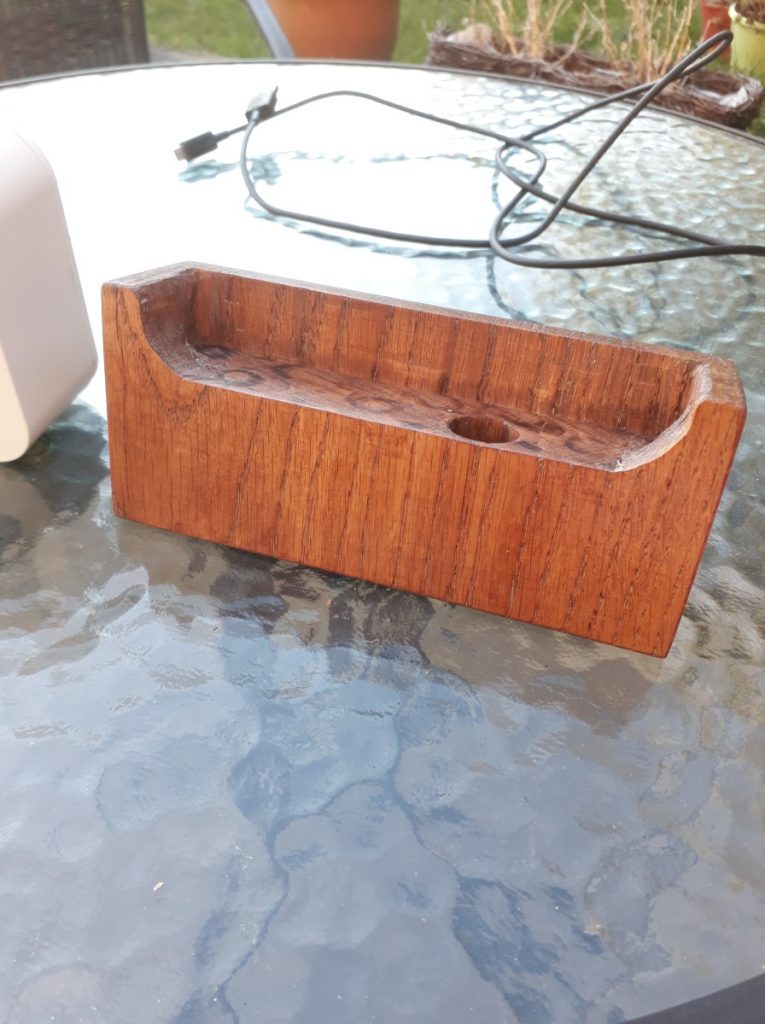
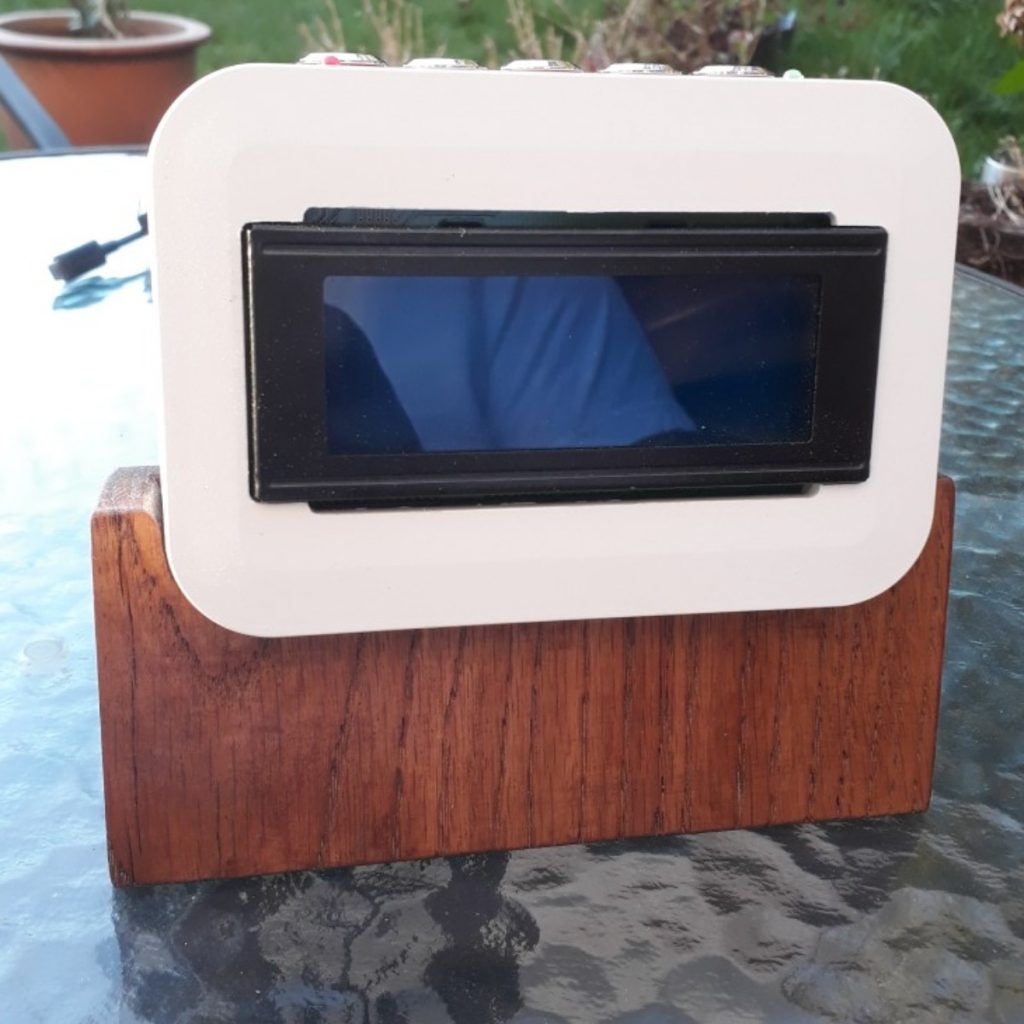
Anyway some photos of the 'finished' item. I found the smallest rounded case I could find that would fit all the components inside. I then needed to hide the lead and have it sit at a slight angle so made a quick stand out of some oak I had laying around.
Features
- Dynamically adds new sensors as they come online and start sending packets.
- Uses DHT22 on the central box, supporting Temperature and Humidity.
- Writes into a postgreSQL DB (Timescale) which is read by Grafana.
- Displaying date/time.
- Switch F or C for temp.
- Tested - Has ran continuously for several months (When I have been busy with other things).
Limitations
Obviously there are some limitations and bits and pieces that need changing.
- Packet structure sent via radio link is fixed, can only send 'sendor id', 'temp' and 'perBatt'. 'perBatt' Is humidity or battery percentage. This design is from the original and needs to be updated to be dynamic.
- Sensor IDs, GPIO pin numbers etc are fixed in code and need to be set in a config file
- Need to implement function so button can safely turn off raspberry pi.
- Need to implement systemd service in case it crashes.
Future
These are some of the things that I have thought about doing.
- Maybe a custom web management tool or mobile app to remove sensors, rename sensors etc.
- Support a complete variety of sensors. Multiple temperature sensors on a remote, pressure etc etc. Pluggable via headphone jack on remote sensor.
Bugs
- Display can occasionally display wrong value for humidity, eg: 100 instead of 100%.
- Remote sensor doesn't display values less than 10 correctly on it's screen.
- Creates an empty page when starting and no sensors are available.
- Sometimes an empty sensor appears
Physical Design (PCB, Schematic, Parts List etc)
I had my design in Fritzing but decided to move it to Kicad so I could learn how to use it. Kicad is pretty good software and very powerful, I didn't print my own PCB but used the PCB designer to layout my veroboard (stripboard).
I have provided the PDF of the schematic below. I have also provided a Zip of the KiCad project containing the PDF schematics and the PCB board layout. You can find out the parts needed by opening the kicad project.
Build Problems
I had a few issues building the weather station, especially as the enclosure was very tight. In my head I thought I would solder some male pins on the veroboard for the buttons to connect into.
I then had to to retrofit a second veroboard on its side where the buttons all connect to (each button having 3 wires), this created many more wires than intended. VCC & GND had to connect to this board and finally connections from this board to the male header pins.
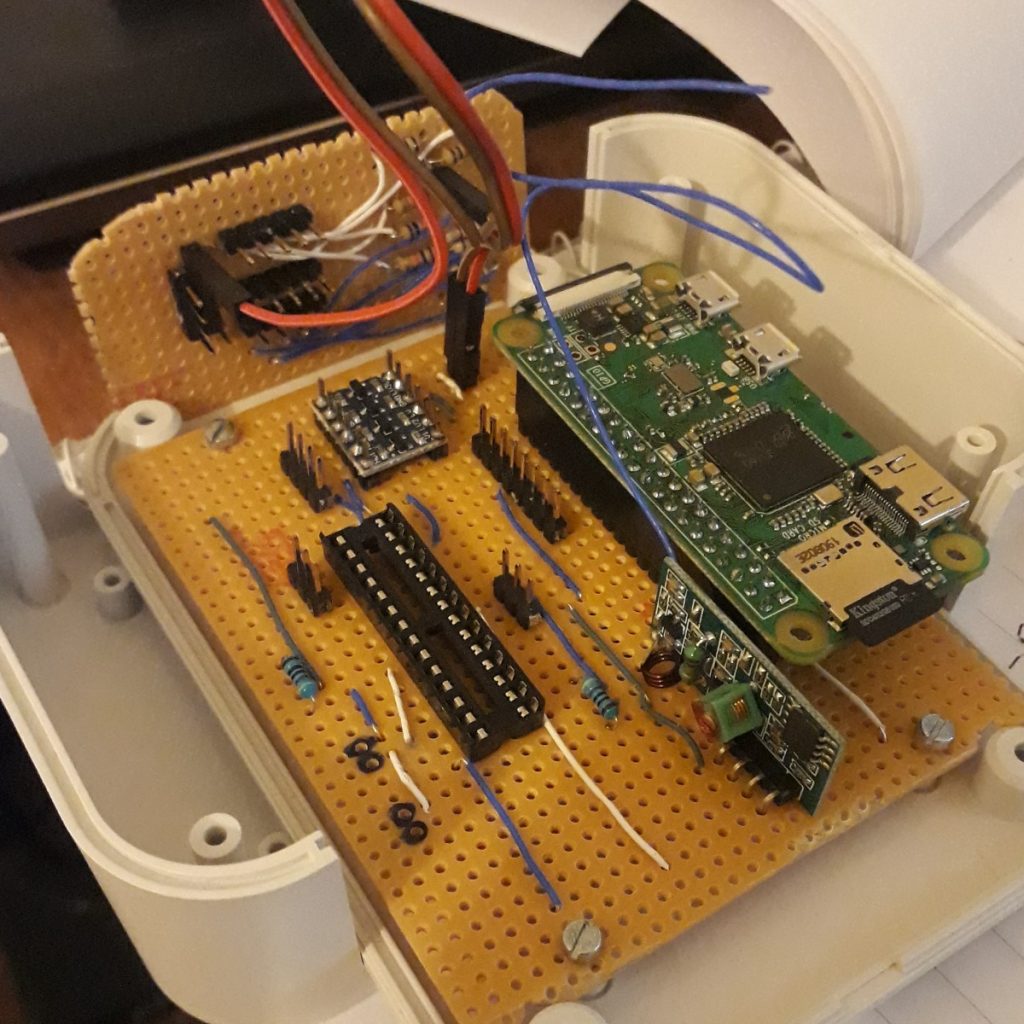
With all these wires in such a thin case (only 40mm deep) made it a bit tricky to put together, at least I don't need to worry about gluing the LCD in place as the wires hold it nicely. I need to mill a hole out the side of the box for the DHT22 to get accurate readings.
The other big headache was the radio receiver for the Atmega328p chip. After putting it together it wasn't picking up any remote sensors while the breadboard did (even without an antenna). I instantly thought it must be interference with all the circuitry. After changing the receiver, the antenna wire and poking the antenna straight out of the case I got intermittent results. Turns out I missed a connection, providing 5V to the high side of the logic converter, resulting in the atmega running at 3V.
I took the opportunity to change the cheap green 5V 433Mhz receiver for one of the ones with a crystal. Seems to be a better radio receiver, which didn't need any modifications to the code or board.
Compiling quickly
The raspberry pi is pretty slow to compile this project mainly due to the easylogging++ header file and other external libraries. To be fair I am developing on a first generation raspberry pi so I imagine the raspberry pi 4 would be quicker.
I was using cmake to cross compile however I couldn't get it link against the postgreSQL library. I found docker to be the most effective and easiest way of cross compiling. I used the balenalib/raspberry-pi-debian:buster image and installed qemu-user-static on my Ubuntu development machine which allowed me to run docker containers against the ARM architecture.
This works really well with Clion. I have set the docker container as a remote development machine in Clion and run the build against that. I can then download the binary from the docker container which gets synced onto the real raspberry pi. No more waiting 30 minutes or so for a rebuild.
Gitlab CI
I have used Gtest for writing unit/integration tests but quite a few need to be run on a real raspberry pi. The binary built using the docker container successfully generates the coverage reports when the Gtests are run because the docker container and raspberry pi run the binary from the same directory.

Comments powered by Disqus.